Monday, September 26, 2011

Tutorial - Making Seamless Overlays in Photoshop

This tutorial will show you how to create seamless pattern using graphics.
1.    First we need to create the layers for the seamless pattern. File-new 400x400 pixels.
Open two graphics that you want to use for you pattern. I am going to use the two graphics that were provided with this tutorial.
2.    File Open – browse to the graphics location
3.    Set the image size so it fits in the 400x400 layer we created in step 1.  Image – Image size, set the size and then click ok.  For this tutorial I set the height to 1.  You will need to do this for both images.
4.    Now that we have adjusted the image sizes we need to move them to the 400x400 layer. Click the image and while holding your mouse on it, click and hold Shift on your keyboard then drag the image over to the 400x400 layer and drop it. Holding Shift will center them in the document. Do this for both images.
5.    You should now have something that looks like this
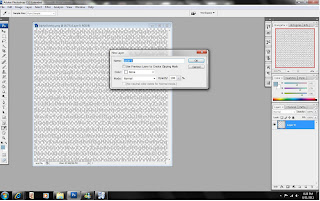
6.    Now lets make it seamless. With your top layer highlighted in the layer panel Go to Filter - Other - Offset. Enter +200 in both boxes and select Wrap Around. Click OK.
7.    Now we need to define this as a pattern.  Go to Edit - Define Pattern... Give your pattern a name and click OK.
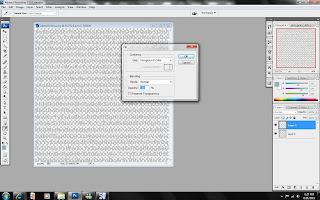
Now lets make a background paper using our new pattern. Create a new document and make it 12”x12” or 3600x3600pixels

Click Edit->Fill->Pattern
Select the pattern you just made and click OK

You now have a seamless background.
Save your background.
Here is an example of mine where I added a white background.
Here is your Overlay Freebie and the tutorial in PDF format and the candy corn and Happy Fall Word Art freebies

You can pick them up here at 4shared.


Monday, September 19, 2011

Tutorial - Creating Striped Overlays in Photoshop using Patterns

Overlays are digital files, in general JPG or PNG used to add texture and change the look of your pictures.  You can also use overlays to make your own background papers.  Using Patterns to create overlays helps to save time and allows you to make more detailed overlays.
1.    Start Adobe Photoshop.
2.    Create a new document and make it 1”x1” or 300x300pixels at 300DPI.
3.    Select the color you want your text to be.  For overlays I usually use a grey color, this make it easier when I want to add color to the overlay. For the purpose of the tutorial I will use Orange.
4.    Select the Shapes icon from the Palette, it right under the Text Icon (T).  Right click and choose the rectangle tool


5.    Now draw the rectangle about ½ the size of the work area.  That should make the Rectangle about 1/2 “ wide by 1” high.
6.  From the layers palette right click and choose Rasterize Layer.
7.  Select Edit->Define Pattern and give your pattern a name and click oK
8.  Create a new document and make it 12”x12” or 3600x3600pixels at 300DPI
9.  Click Edit->Fill->Pattern
10.  Select the pattern you just created
11.  You now have a two stripe overlay.
12.  Save your stripe overlay. 
Here is an example of mine where I added a white background.
Here is today's freebie, PDF of the tutorial above and for those that don't use Photoshop a striped overlay.
You can get this here at 4shared.


Monday, September 12, 2011

Tutorial - Creating Overlays

Overlays are digital files, in general JPG or PNG used to add texture and change the look of your pictures. You creating your own overlay you can use it to make your own background papers.
1.     Start Adobe Photoshop.
2.    Create a new document and make it 12”x12” or 3600x3600pixels at 300DPI.
3.    Select the color you want your text to be.  For overlays I usually use a grey color, this make it easier when I want to add color to the overlay. For the purpose of the tutorial I will use black.
4.    Select the T from the palette bar on the left
5.    Next pick the font you want to use and the size.  For the purpose of this tutorial I choose Arial 36pt
6.    Click on the blank space where you will be creating your overlay
7.    Then type I space space space space School
8.    Now click on the arrow in the palette on the left side
9.    Move the text to the upper left hand corner
10.    Then from the layers palette on the right hand side Right click and select duplicate layer, click OK
11.    Move the new layer (which is directly on top of the previous layer) over to the right of the first I School
12.       Duplicate and move the layer 3 more times until you have the entire row filled

13.       Next select Layer->Merge Visible. 
14.    Then from the layers palette on the right hand side Right click and select duplicate layer, click OK
15.    Move the new layer (which is directly on top of the previous layer) below the first line of I School
16.    Continue duplicating the layers and moving them down until the entire page is filled.
17.       Merge all of the layers into one layer Layer-> Merge Visible
18.       Select the splat (shape icon) from the left palate and choose a heart
19.       Click on the I School document and draw a heart between I and School
20.    Click on the Layers Palette on the right hand side, right  click and choose Rasterize layer.
21.    Duplicate the heart layer and move it to the next I School, continue until one line is complete (remember you will need to click on the Arrow on the left hand palette to be able to move the layer)
22.  From the layers Palette click on the I School layer to make it invisible

23.    Click on one of the Heart layers and select Layer->Merge Visible
24.    Turn back on the I School layer
25.    Duplicate the Heart layer and move it down until the entire page is filled.
26.    Turn off the I School Layer
27.    Click on one of the Heart layers and select Layer->Merge Visible (you should now have two layers)
28.    Turn back on the I School Layer
29.    To save as an overlay you will need to save each layer as a PNG file. To do this just hide one layer and then click on save, it will save the visible layer.
30.    You are now ready to add color to the layers.  You can use the previous Tutorial Using Overlays if you need help with this.
Here is an example I did with mine.
You can also get the pdf of this here at 4shared.
For those of you that don't use Photoshop there is a PNG of the Overlay included with the PDF.

Monday, September 5, 2011

Tutorial - Using Overlays in Photoshop

Overlays are digital files, in general JPG or PNG used to add texture and change the look of your pictures. You can also use overlays to make your own background papers.

1) Start Adobe Photoshop.
2) Open the Overlay you want to use
3) Select the color you want your text to be.
4) Select Layer->New->Layer, click OK
5)  Select Edit->Fill->Foreground Color

6)  Select Layer->Group with Previous or press CTRL-G


7)  If you want the background color to be white, just click File->Save As, Enter a file name and select JPEG as the format.

Want the background to be a color other than white

1) Select the color you want the background to be
2) Click on Layer->New Layer
3) Click on Edit->Fill->Foreground Color
4) Now we need to move the new layer under the Text layer, just drag it until you get to the bottom
5) Before dragging

After Dragging

You can also get the pdf of this here at 4shared.
For those of you that don't use Photoshop there is a PNG of the Overlay included with the PDF.

Sunday, September 4, 2011

Reference - Candy Wrapping Dimensions

This table provides guidelines for the sized of the different Candy Wrapping items.

Candy Template
Dimensions W x H
8 x 6 Glass Block
 6.8” x 4.8”
8x8 Glass Block
 6.8” x 6.8”
Bookmark
 2.0” x 6.0”
Breathsavers
2.5” x 3.00”
Bubbles 4oz
 6.00” x 2.5”
Bubbles 8oz
 6.9” x 2.810”
Cocoa/ Seed Packet
 8.5” x 6.6”
Gable Box
10.3” x 7.93”
Gallon Paint Can
 10.5” x 7.3”
Gallon Paint Can Lid
 5.3” x 5.3”
Grab N Go
10.5” x 5.1”
Kiss or Reeses Label
 0.75” x .075”
Lifesavers
 3.4” x 3.1”
Mentos
 5.3” x 3.2”
Mini Wrapper
 1.45” x 2.99”
Mintbooks
 2.0” x 5.0”
M&M Tubes
 3.2” x 4.5”
Pinch Box
 10.3” x 7.93”
Play Doh Party
 4.5” x .072”
Popcorn
 6.7” x 8.69”
Quart Paint Can
6.9” x 4.6”
Quart Paint Can Lid
 3.1” x 3.1”
Rolo’s
4.3” x 3.5”
Salt & Pepper (both labels)
 5.7” x 7.150”
SCE - 1.55 oz
 6.7” x 5.5”
SOE - 1.55 oz
 5.2” x 5.5”
Stick of Gum
 3.0” x 2.5”
Sour Cream Container Pouch
 6.4” x 4.00”
You can also get this in PDF format here at 4shared.