Monday, October 31, 2011

Tutorial - How to create a Bracket Frame

How to create a bracket frame in Photoshop

1.    Start Adobe Photoshop.
2.    Create a new Image/Document File -> New
3.    I am using H 1200 x W 1200 pixel for this tutorial


4.    Select the color you want your mat to be (I will use black for this tutorial)
5.    Select the Text Tool. Choose a font, I selected Trebuchet.  Choose a large font size.  I chose 250 pt.
6.    Type the curly bracket ( { ) character.
7.    Move to the desired location.
8.    Duplicate the layer by selecting Layer, Duplicate Layer.  You can also right-clicking on the layer in the layer palette and then select Duplicate Layer.
9.    Now we need to flip the bracket over.  Select Edit > Transform > Flip Horizontal.
10.    With the Move Tool, move the bracket to the other side of the canvas.
11.    Next duplicate the layer you just created.  Layer, Duplicate Layer.
12.    Rotate the layer 90 degrees Counter clockwise ((Edit > Transform > Rotate 90o CCW).
13.    With the Move Tool, move the bracket to the top of the canvas.  Don’t worry if they don’t line up exactly you can fix that later.
14.    Duplicate the layer, Select Layer, Duplicate Layer
15.    Flip the new layer vertical (Edit > Transform > Flip Vertical).
16.    With the Move Tool, move the bracket to the bottom of the canvas.
17.    Now using the move tool, select each layer and move the bracket to the desired location, if needed.
18.    Merge the layers, Select Layer, Merge Visible.
19.    Save your bracket frame.
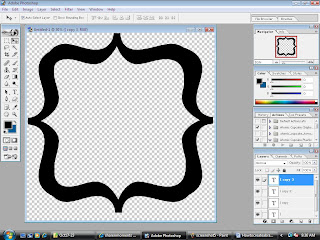
Here is an example of one I made and a bracket frame template

You can pick up both of these in PNG format and a copy of the tutorial in PDF format here at 4shared.


Monday, October 17, 2011

How to make Ric Rac in Photoshop Tutorial

Creating Ric Rac


1.    Start Adobe Photoshop.
2.    Create a new Image/Document File -> New
3.    I am using H 225 x W 3600 pixel for this tutorial
4.    Select the color you want your ric rac to be
5.    Select the Rectangle tool
6.    Draw a rectangle on the canvas.  Don’t fill the entire area or the waves of the ric rac might be cut off
7.    You will need to rasterize the layer, Layer -> Rasterize -> Layer
8.    Next select Filter -> Distort -> wave
9.    Here are the settings that I use
10.       Your ric rac should look something like this
11.       You can now add texture, or layer styles to give it more definition.  Here is an example of adding some inner shadow.
The freebie today is a PDF version of this tutorial and the ric rac I created in the tutorial
You can get these here at 4shared.


Monday, October 10, 2011

Tutorial - Using patterns/colors to color graphics in Photoshop

Using Patterns to Color Graphics, templates, etc

1.    Start Adobe Photoshop.
2.    Open a background paper.  For this tutorial I used the papers shared on Sharenmoments blog.
3.    Edit -> Define Pattern. Enter the pattern name and click OK


4.    There are two ways you can color in the grey area

1st Way

1.    Next open the item that you would like to color in.  For this step I used a free doodle frame from delicious scraps
2.    I actually hid the Outline layer for these screen shots.
3.    In the layers palette click on the F in the bottom and select Pattern Overlay, or just double click on the layer you want to add the pattern to and select Pattern Overlay

4.    Next select the pattern you just created from the background
5.    Next to adjust the appearance of the pattern change the scale accordingly and click OK.
6.    Here is an example of my frame using the background and scale shown in this tutorial.

2nd Way

This way works great when you are trying to color in line art.  In this example I will use the same frame that I used in the 1st way.  This way does not allow you to scale the pattern.
1.    Next open the item that you would like to color in.  For this step I used a free doodle frame from delicious scraps
2.    I actually hid the Outline layer for these screen shots.
3.    From the tools palette select the Magic Wand tool
4.    Now select the area that you want to color in, you will see dancing lines around this area. For the frame it selects the entire thing.
5.    Next Select Layer -> New Layer
6.    Next Select the Paint bucket from the tools palette.
7.    Select Pattern and chose the pattern you want to fill in the selected area with.
8.    Here is mine once I have selected my pattern
Here is the tutorial in PDF Format
You can pick this up here at 4shared.

Tuesday, October 4, 2011

Creating Embossed Papers in Photoshop

Today's tutorial is how to create embossed papers in photoshop.

1.    Start Adobe Photoshop.
2.    Create a new document and make it 12”x12” or 3600x3600pixels at 300DPI.
3.    Select the color you want your paper to be.  For the purpose of the tutorial I will use Orange.
4.    Fill your canvas with a color of your choice.  I used Edit -> Fill Layer ->Foreground color
5.    For this step you will need to have the pumpkin face overlay psd file that was included with this tutorial or another psd overlay.  If you only have png overlays, open the png file in Photoshop and then save it as a psd file.
6.    Select Filter -> Texturizer
7.    Select Load Texture.  Navigate to the location of the psd overlay you want to use.  For the purpose of this tutorial I will load pumpkinfaceoverlay.psd
8.    Adjust the scaling and relief until you are satisfied with the results
9.    Here is an example of mine once the Texture has been applied.
Here is the tutorial in PDF format, the overlay in PSD format and also the pumpkin face overlay in PNG for those that do not use Photoshop.

You can pick these up here at 4shared.